Do you want to add rich snippets on your WordPress site? Not sure what are rich snippets, and why you should use it on your WordPress site? Rich snippets allow you to have custom search listings for special content such as reviews, recipes, events, etc. In this article, we will show you how to use rich snippets on your WordPress site.
Why You Should Use Rich Snippets on Your WordPress Site?
Rich snippets provide site owners another way to communicate with search engines. Structured data allows search engines to see different types of content on your site, and use rich snippets to show additional information in the search results.
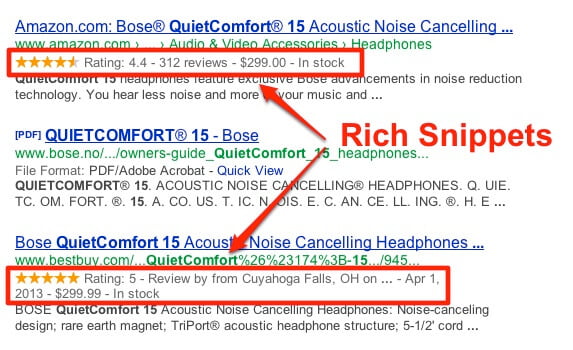
This additional information in search results make your listing more noticeable in search, which means more organic traffic for your site.
It also helps you build authority in your niche, as your site becomes more visible in the search.
Rich snippets are not just for reviews or recipes. You can use rich snippets for events, products, people, video, music, apps, articles, blog posts, etc.
Now that you know how beneficial rich snippets can be, let’s take a look at how to add rich snippets in WordPress.
We will show two methods: manually adding rich snippets in WordPress as well as using a rich snippets WordPress plugin.
Adding Rich Snippets in WordPress Using a Plugin
Maintaining rich snippets manually can be difficult even for the most experienced site owners. Luckily, there are several WordPress plugins that will make it super easy for you to add rich snippets in your WordPress posts.
First thing you need to do is install and activate the All In One Schema.org Rich Snippets plugin. Upon activation simply click on the Rich Snippets menu icon in the sidebar to continue.
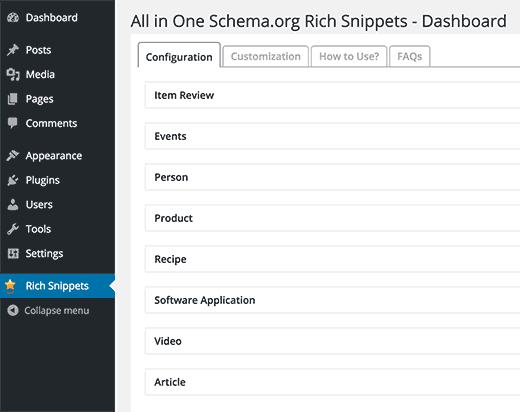
You will be able to see different content types that you can create with the plugin. The list includes:
- Item Review
- Events
- Person
- Product
- Recipe
- SoftwareApp
- Video
- Article
Clicking on any content type will show you the fields that will be available when a user is writing a post/page or any custom post type.
Now you need to create a new post or edit an existing one. Just below the post editor, you will see a new meta box labeled Configure Rich Snippet. Inside, you will see a drop down menu where you can select content type for the post you are working on.
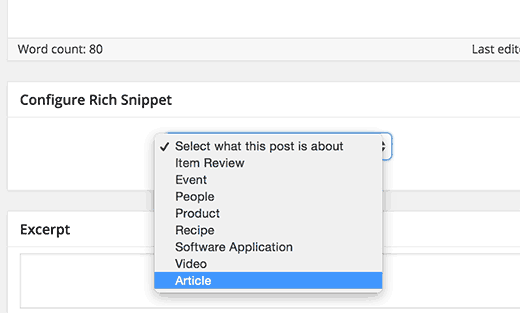
Selecting a content type will display the rich snippet fields you need to fill. In the screenshot below, we selected the article content type, and it showed us article name, author, short description, and article image fields.

You can change it to recipe, event, or whatever content type you are creating and then fill in the fields. You are not required to add all fields but some of the fields are required by Google to display rich snippets.
Don’t forget to save your post to store the rich snippets data.
Adding Rich Snippets Manually in WordPress
Rich snippets or structured data markup can be written into three different vocabularies. These vocabularies are microdata, RDFa, and JSON-LD. You can use any of them on your site. However, most beginners find RDFa to be more beginner friendly.
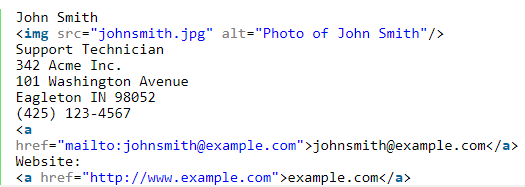
Here is an example of a user’s about page in WordPress. Normally the text of the page will look something like this:
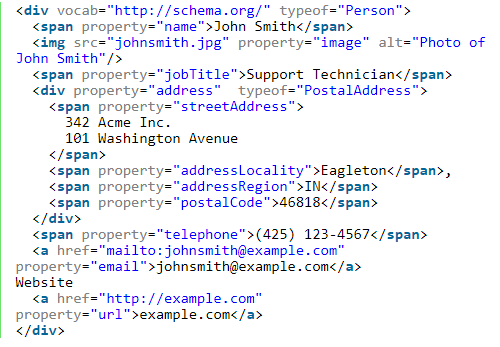
This can be easily transformed with rich snippets. If you are familiar with HTML, then you can easily understand the following example:
If you are manually adding rich snippets into your WordPress posts, then you will need to use Text editor so that you can write the required markup. You may also need to refer to Google’s Developer resource on structured data to understand which properties are required for a content type.
Testing Your Rich Snippets
Google and other search engines may not immediately pickup your rich snippets or show it in search results. How do you know that you are using rich snippets correctly on your site?
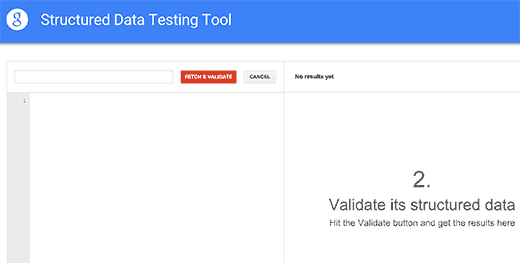
You need to simply visit Google’s Structured Data Testing Tool. You can either paste your markup in the tool box or click on the Fetch URL link to enter a URL. Click on the Validate button and the tool will review your markup.
We hope this article helped you learn how to use rich snippets on your WordPress site. You may also want to checkout our list of the 9 best WordPress SEO plugins and tools that you should use.